Bookish Vs Practical Knowledge

After spending considerable amount of time in IT industry, one of the gentleman brought up this topic of bookish knowldge vs practical knowledge. Perception was that if you have not implemented certain pattern and you still know what the pattern does, then it is a bookish knowledge per the gentleman.

At an outset it might seem to be an agreeable statement, I have a different view. Most of the time architects evaulate the design in the mind’s labouratory. For example, a circuit breaker pattern. I dont think its a bookish knowledge if you know when to use a circuit breaker pattern. I do think it is a bookish knowledge if you just know how many states are there in the circuit breaker.

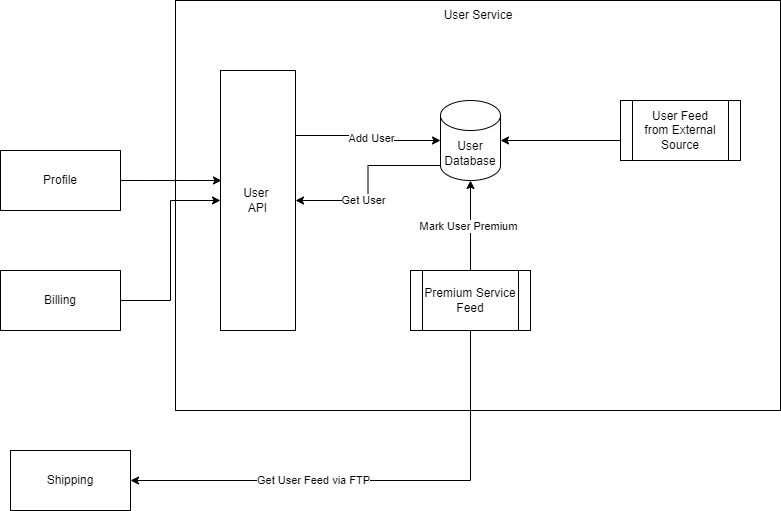
There is a tendency of loading up every pattern that is deemed best into the application. CQRS is a best example. These days I hear a lot about CQRS, and I know for sure that this is a pattern which suits complex systems where there are tones of business rules and behaviors in play. If you want to separate write and read databases, you can do it with read replicas. You don’t need CQRS for it.

Again, if you go behind business rules, not all business rules are complex even though they sometime look like. Storing and pulling customer data is not a business rule. Storing and pulling some entity is not at all a business rule. Business rule is something where you are going to calculate data based on rules, for example.. show the customers as premier if they have done purchase beyond certain limit.

Closing Note

This blog is a self reminder that there are different perspective to software architecture depending on the experiences one hold. I wrote this blog to dispel the notion that there is no wrong or right architecture. Architecture should ease out the pain for development team, devops, QA and deliver the right value to the organization. If there is no circuit breaker, CQRS and everyone is happy then that architecture is still good. If everyone is in pain fixing the code day in dayout because of wrong architecture with all the known best patterns, then why not simplify it.

Closures in Python

Recently I came across python closures. I know closures in javascript. However I didnt know closure exists in python too.

A closure in Python is a function object that has access to variables in the outer (enclosing) function’s scope, even after the outer function has finished executing.

A concise video on closure is here on youtube.

Whats the Use of Closure?

One of the usecase I could think of is caching. Lets say you make a call to an API and you want to cache the result and work off the cache, this is going to be very usefule.

Following is an example of it.

from collections import namedtuple

def get_api_handler():

cache:str = None

if(cache == None):
print("Fetching from API and loading the cache")
cache = "Hello World"

def get_value():
print("Fetching from cache")
return cache

api_handler = namedtuple('api_handler',['get_response'])
return api_handler(get_value)

def main():
api_handler = get_api_handler()
api_handler.get_response()

if __name__ == "__main__":
main()

First time when you do api_handler.get_response(), API is called and cache is loaded. Subsequent requests will be served from the cache.

Now, I am also using another concept of python called namedtuple to treat closure like object. You can refer to this youtube video for the same.

Ending Note

Closure is a very powerful feature offered by languages. Different use cases can be implemented with the help of closure. We explored caching as one of the usecase. Other usecases as I know are implementing function factories, encapsulation of private variables, decorators.

Managaing Command Line Arguments in Python

I recently came across a program where we had to manage the command line arguments. And the easy way to go do that was using argparse package.

argparse is a Python module in the standard library that provides a mechanism for parsing command-line arguments. It makes it easy to write user-friendly command-line interfaces for your Python programs.

What can you do with it? Let me show you some of the capabilities.

Command Line Help

Following is a simple program with argparse.

import argparse

def main() -> None:
parser = argparse.ArgumentParser(
prog='Sample Program',
description='Demonstrated Argparse Functionality',
epilog='Happy coding')
parser.add_argument('-f', '--filename') # positional argument
parser.add_argument('-c', '--count') # option that takes a value
parser.add_argument('-v', '--verbose') # on/off flag

args = parser.parse_args()
print(args.filename, args.count, args.verbose)

if __name__ == '__main__':
main()

You can run this in as a python program. When you execute the following command, you will see

python main.py --help
usage: Sample Program [-h] [-f FILENAME] [-c COUNT] [-v VERBOSE]

Demonstrated Argparse Functionality

options:
-h, --help show this help message and exit
-f FILENAME, --filename FILENAME
-c COUNT, --count COUNT
-v VERBOSE, --verbose VERBOSE

Happy coding

Required Arguments

You can make certain arguments as required like shown below.

 parser.add_argument(‘-f’, ‘–filename’, required=True)  

When you execute the program with out filename it will show you the message like below.

usage: Sample Program [-h] -f FILENAME [-c COUNT] [-v VERBOSE]
Sample Program: error: the following arguments are required: -f/--filename

Fixed Argument Values

Lets say filename has to be “text1.txt” or “text1.csv”. It can not be any value other than that. Then you can specify the choice to restrict the values like shown below.

parser.add_argument('-f', '--filename', required=True, choices=["text1.txt","text1.csv"])    

If you try to run the program with invalid choice, you will get the following error.

usage: Sample Program [-h] -f {text1.txt,text1.csv} [-c COUNT] [-v VERBOSE]
Sample Program: error: argument -f/--filename: invalid choice: 'somefile.txt' (choose from 'text1.txt', 'text1.csv')

Constant Values

Suppose I do not want to pass the count, and set a default count to 1.

parser.add_argument('-c', '--count', const=1,action='store_const') 

When the execute the program with the following command

python main.py -f text1.txt  -c  -v "verbose"

I see the values as

text1.txt 1 verbose

Notice that I am not passing argument after -c. It is a constant which is considered internally.

Closing Note

Argparse has a lot of features around command line arguments and execution. This is few of the ones which I noticed on the surface. There are more features like adding type safety to the arguments. I will be sure to post as I come across an interesting feature. Until then bye, see you around, and thanks for reading the blog.

SQS and Lambda on LocalStack

In my last post I had shown how to install LocalStack on your local machine. Link is here.

In this post, lets create a queue which on recieving a message will trigger a lambda. All on LocalStack.

Creating Infrastructure

There are various ways to create infrastructure setup. I am going to use boto3 library on python.

Copy the following code to create a queue.

import boto3

# Create a Boto3 client for SQS.
sqs = boto3.client('sqs', endpoint_url='http://localhost:4566',region_name='us-west-2', aws_access_key_id="dummy", aws_secret_access_key= "dummy")
# Create a queue.
queue = sqs.create_queue(QueueName='input-queue')
print(queue)

Note the region is us-west-2. If you navigate into LocalStack desktop you should see the queue created under SQS.

Creating Lambda

Lets now create a lambda which we will evenually trigger from the queue. Lets first create a lambda. Create a python file with the following content. In my case file name is app.py

def lambda_handler(event,context):    
return {
"statusCode": 200,
"body": "Lambda triggered from SQS"
}

Lambda doesnt do much. It will just return status code as success. My folder structure is as shown below.

Create_infra.py is a file where I have kept the code to create queue, lambda, and I am going to bind them together.

Create a zip folder from app.py

Lets now write the code to create the lambda.

lambda_client = boto3.client('lambda',endpoint_url='http://localhost:4566',region_name='us-west-2', aws_access_key_id="dummy", aws_secret_access_key= "dummy")

lambda_client.create_function(
FunctionName="test_lambda",
Runtime='python3.8',
Role='arn:aws:iam::000000000000:role/lambda-role',
Handler="app.lambda_handler",
Code=dict(ZipFile=open("app.zip", 'rb').read())
)

Note you need to specify the zip file you created and that needs to be under same folder. Once lambda gets created you will see that in the lambda section of LocalStack desktop.

Binding Queue with Lambda

Lets now bind queue with lambda so that when a message arrives in queue, lambda is triggered. Execute the following code. Note that function name (the name of the function we created), and queue arn have to be specified. You can get the arn from the SQS section navigating to the queue.

response = lambda_client.create_event_source_mapping(
EventSourceArn='arn:aws:sqs:us-west-2:000000000000:input-queue',
FunctionName='test_lambda'
)

Validating the Setup

Lets now send a message into the queue. Lets navigate to SQS, and select the input-queue.

Switch to Messages in the tab.

In the bottom bar you should see the “Send Message” button. Click on it. Select the Queue Url and enter Message Body. The click Send button.

Message shows up in the list. However it will be picked up by the lambda.

Now navigate to the Lambda from the main dashboard. Select test-lambda.

Switch to Logs tab. You should see Start, End and Repor.

This means lambda is triggered by the message we sent on the queue.

Closing Note

LocalStack is one of the easy way to build the AWS workflow. Complex workflows can be built easily as POC and then migrated to production systems.

LocalStack – AWS Emulator

LocalStack is a cloud service emulator that can run on your local and gives most of what AWS cloud offers for development. You can develop code in your local, test it end to end without need of connecting to AWS. Atleast this is why I went on installing LocalStack on my machine. So far I am able to test SQS and Lambda, and it is pretty promising. 🙂

Lets see how to install LocalStack first.

Pre-requisites

I am using docker to run LocalStack since it is easy to cleanup. Make sure you install docker before continuing with next steps.

Also you need python inorder to install LocalStack.

LocalStack Installation

I had python on my machine. So I went with the following command.

python -m pip install localstack

Once done install awslocal cli. You may need to do it with elevated permission.

pip install awscli-local[ver1]

Starting LocalStack

Lets now start LocalStack with the following command. Make sure docker is running.

localstack start -d

You should see the following in the command prompt.

Validation

Lets create a SQS queue and see if it works. Execute the following command.

awslocal sqs create-queue --queue-name sample-queue
{
"QueueUrl": "http://sqs.us-east-1.localhost.localstack.cloud:4566/000000000000/sample-queue"
}

Lets now list the queues and see queue is created from the above command.

awslocal sqs list-queues

You should see the queue.

Do I Have a UI?

Yes. There is a UI to navigate across components just like in AWS console. I downloaded it from Microsoft Store since I am using Windows 11.

Configuring LocalStack Desktop

When you open the LocalStack desktop, you will see the link

Select the link. Then enter the following endpoint.

http://localhost:4566

You will be asked to login by creating account on LocalStack. After logging in you should see the dashboard.

Some of the features are Pro features which needs to be purchased. But majority are still open to use.

Lets now select SQS in the dashboard to look at our created queue. You will see the created queue as shown below.

Closing Note

Running and testing the program on local is much much faster than on the cloud. LocalStack can significantly reduce the turn around time of building quality AWS program or architecture. I see LocalStack even support writing program with AWS CDK. I have not gone too far in it. I am impressed.

Debugging AWS Lambda in Local

AWS Lambda is a serverless compute service provided by Amazon Web Services (AWS). It allows you to run code without provisioning or managing servers. With Lambda, you can upload your code (written in languages such as Node.js, Python, Java, Go, and more) and AWS Lambda takes care of provisioning and managing the servers, scaling automatically to handle requests.

This blog post is about running AWS Lambda in local. We need the following pre-requisites to be installed in order to run AWS Lambda in local.

  1. sam cli – Download SAM CLI from here.
  2. VS Code
  3. Python
  4. Docker
  5. AWS Toolkit for VS Code

AWS SAM CLI

After installing run the following command to verify.

sam --version

VS Code

Create a folder and open it in VS Code. Add app.py as shown below, and add the following code.

def lambda_handler(event,context):
return {
"statusCode": 200,
"body": "Hello from lambda"
}

Select Run and Debug. And click on “create a launch.json” link. That will create a new launch.json file.

In the launch.json settings add the following content.

{
"version": "0.2.0",
"configurations": [
{
"type": "aws-sam",
"request": "direct-invoke",
"name": "Invoke Lambda",
"invokeTarget": {
"target": "code",
"lambdaHandler": "app.lambda_handler",
"projectRoot": "${workspaceFolder}"
},
"lambda": {
"runtime": "python3.10",
"payload": {
"json": {}
}
}
},
{
"name": "Python Debugger: Current File",
"type": "debugpy",
"request": "launch",
"program": "${file}",
"console": "integratedTerminal"
}
]
}

Make sure to set your version of python in the lambda runtime.

Validation

Now go to Run and Debug, and select “Invoke Lambda” as debug profile and click run.

If you dont have docker running you will see the following error.

Error: Running AWS SAM projects locally requires Docker. Have you got it installed and running?

If everything is fine, docker image is built and lambda is invoked.

You can even debug your code keeping breakpoint.

Closing Note

I started looking for ways to run my program in local without being dependent on AWS. And one of the thing I came across is lambda functions. After doing some research over the internet I skimmed through several youtube links and articles. I could find this youtube link “Tech talk with Eric” very useful in achieving the result, from which I have shared the notes above. I am sharing other resources below if you want to drill deep.

Resources

Debugging AWS Lambda Locally: Step-by-Step Guide with AWS SAM CLI and VSCode (Part 1)

Locally Debug Lambda Functions with the AWS Toolkit for VS Code

AWS Links

Step-through debugging Lambda functions locally

Tutorial: Deploying a Hello World application

Service Boundary

Is service an API hosted on a cloud or on-premise server which does CRUD operations on a database? Can service be hosted in the same process if not in an API?

In reality service can be hosted in the same process or outside the process. In other words to say service is not an API. When some one says user service, it is the only source of user and only source of operations on the user. There is nothing outside of user service which will manipulate the user data. It is the single truth for the user data.

Then how does user service looks like from architecture perspective? Like one shown below.

How can a User service look like from Technical Perspective?

In the technical view you can have user service contains several things going on inside it. It can have even more than one database inside, several processes running each doing different things. A batch job could be running within the service boundary. 

Notice that shipping service is recieving user feed via FTP. It is not an API call here unlike Profile and Billing services.

Shipping service can hold the cache of user data, but it will turn stale. It still need to go fetch the data from user service to refresh its cache.

Ending Note

We need to be careful designing the service. Service has a logical boundary, has reason for its existance and is a single authority of its data. There should not be two services accessing the same database. For example, Shipping service accessing the database of User Service.

Here is the link to a talk from Udi Dahan about service and its boudaries. Very insightful.

Ordered List Vs Unordered List

While working with React applications or HTML applications, most of the time I see <ul>. An unordered list. I got curious to know why there is an unordered list and an ordered list, what their use cases are.

Here is a simple use case which gives the gist of their existance.

Ordered List

Lets take an example of a tutorial where the presenter says

  1. Open the editor
  2. Write the code
  3. Run the code

All these steps should be executed in order. Thus it makes sense to put them in a ordered list.

Unordered List

There is no sequence of steps or operations. Presenter says

  1. Susbcribe to news letter
  2. Leave a review
  3. Write a comment

Even if you don’t follow these steps in order, it is fine. They qualify to be in unordered list.

Ending Note

Why am I writing about ordered vs unordered list, though they seem like very basics of HTML? It is because when it comes to coding most of the time I have seen folks switching everything to unordered list. Thought process focuses only on the presentation, but not the element that needs to go with it from HTML standpoint. 

When choosing HTML elements, you should consider the purpose and semantics of the content you’re trying to represent. HTML elements are typically chosen based on the type of content you want to display, and they are designed to convey the meaning of the content to both browsers and developers.

Additional Resources

A short guide to help you pick the correct HTML tag

H48: Using ol, ul and dl for lists or groups of links W3 Link

How do you choose the right HTML tags for your web page content?

Event Bubbling

While going through a course on reactjs I suddenly remembered the concept of event bubbling back from the days of jquery. When an event occurs, it can trigger the handler on current control, plus handler in its parent.

Event bubbling occurs in the order from the target element to the root of the document.

Here is an example of the event bubbling. You can try running from jsfiddle link.


  <div id="parent">

<div id="child">Click me</div>
</div>

<script>
$(document).ready(function() {
$("#parent").on("click", function(event) {
alert("Parent div clicked!");
// Uncomment the next line to stop event bubbling
// event.stopPropagation();
});

$("#child").on("click", function(event) {
alert("Child div clicked!");
// Uncomment the next line to stop event bubbling
// event.stopPropagation();
});
});
</script>

When you run the script, you will first see “Child div clicked!” alert followed by “Parent div clicked!”.

If you dont want the event to reach parent, you can call event.stopPropagation() on the child event handler.

There is a dirth of information in this stackoverflow thread if you want to dig deeper.

Why Does This Model Exist?

Per W3C document, it is designed with two main goals.

Generic Event System

The first goal is the design of a generic event system which allows registration of event handlers, describes event flow through a tree structure, and provides basic contextual information for each event. More details in this W3C document.

Backward Compatibility

The second goal of the event model is to provide a common subset of the current event systems used in DOM Level 0 browsers. What is DOM Level 0? It doesn’t specifically denote a version of the DOM. Instead, it historically refers to the early days of JavaScript and web development when browsers implemented their own proprietary JavaScript features, and there wasn’t a standardized DOM.

Ending Note

There should always be a reason for any model to exist, be it DOM or the this event model. It will always help in understanding the scripting language better, because we understand the philosophy behind it.

Being Frugal with Containers – Part 2

In my previous post I had tried to reduce the resource usage to see the mininal configuration. Here is the link to the post.

I was not able to assess the CPU usage as per the configuration set. However after integrating docker with New Relic, I am able to see the CPU usage here. Here is the link to my blog post for integrating docker with New Relic.

I had set the max CPU for API to 0.01 which is 1% of 1 CPU core. I had set the CPU for mongo db to 0.03 which is 3% of 1 CPU core.

CPU Usage of API

In New Relic you can see the following for CPU..

You can see the CPU usage is within the 0.01 limit. Looks like during startup it consumed more CPU and then came down after that.

CPU Usage of Mongo Db

I had set CPU to 0.03 for Mongo Db. And if you see the graph it is within 0.03 except during startup.

Ending Note

New Relic is a vast tool for monitoring performance and health of an application. It helped me demystify CPU stats from my previous experiment, and hence sharing the learning in this blog post.